Good Morning everyone, Happy Monday!
Today it’s my turn for the Hostess Monday spot over at Digital Delights
I have a fun project I am sharing along with a tutorial on how you can
create your own Shadow Box
I will forewarn you this is a long post with lots of pictures, so you might want to grab
Your favorite cup of choice, as I share how I created a fun Shadow Box

Once I created my Shadow Box I began decorating each of the windows
using Wendy's adorable images and sentiments.
My first area showcases Hip Hop Myrtle Turtle. second window I used
one of the sentiments from the Dream Sentiment set, I also added Follow Your Dreams from the
same collection, my last window I added Dilly Duck with Ladybug.

For the out sides of my box I covered with 12" x 1" strips of decorative paper, created a fun
bow using the same papers and then added a felt flower and button
I have seen a few of these shadow boxes around blog land, and loved the concept of the idea. I couldn’t find a tutorial per say so I decided to try my hand at creating my own, which I found to be very easy and fun to do.
Supplies: To create a 8x8 Shadow Box
12 x 12 cardstock (I used white but you can use a color)
One 8” x 4 “ card stock
Two 4” X 4” card stock
- Scor-Pal™ or other scoring tool
- Adhesive
- Bone Folder
- Scissors
- Hot Glue Gun
Additional cardstock, patterned paper and embellishments for decoration

Step 1 score 12x12 card stock at 1" and 2 " on all four sides

Here is what you should have

Step 2 - Using scissors cut away the three corner block on all four sides
to create your corners

Step 3 - once you have cut away the three corner squares
then score the middle square down the middle to create a clean
pleat for your corners

Step 4 Prefold all scores with bone folder

Step 5 - Add Sticky tape to one side of your corner pleat
and along the edge ( I do this so it will hold the side flaps down)

Step 6 - remove your tape film from corner pleate and adhere
on all four corners

Step 7 - remove your tape film from each side flap and fold down inside
your 8x8 shadow box base is completed

Step 8 - score your One 8" x 4" and your Two 4"x 4" piece of card stock at
1", 2" and 3"
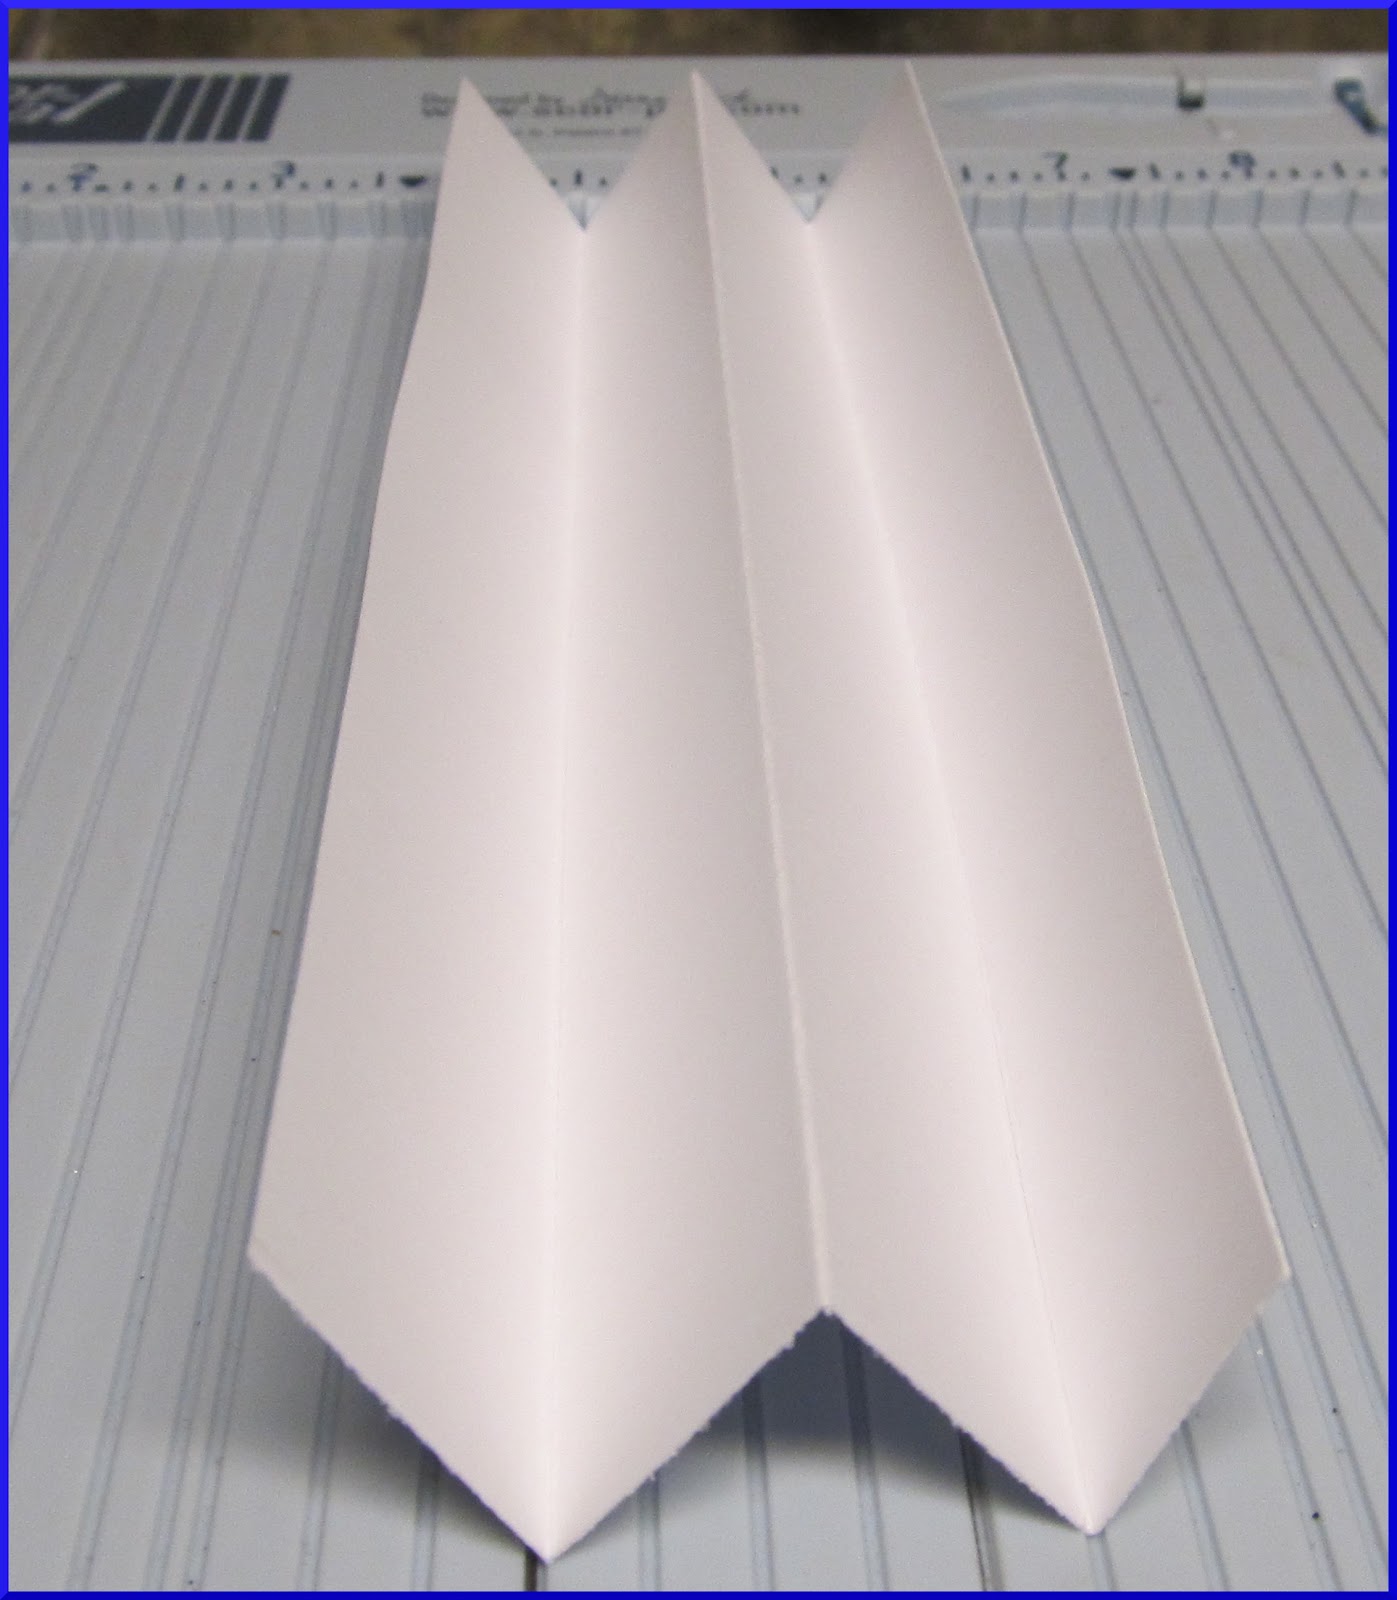
Step 9 - Prefold scores in a mountain/valley style fold (up and down)
on all three pieces to create your Shadow Box dividers

Step 10 - I adhere the middle with tape to secure the
fold

Step 11 - find the middle of your shadow box and tape
your 8x4 folded divider in place

Step 12 - repeat with the Two 4x4 dividers, place where
you wish to create your individual windows within your Shadow box base
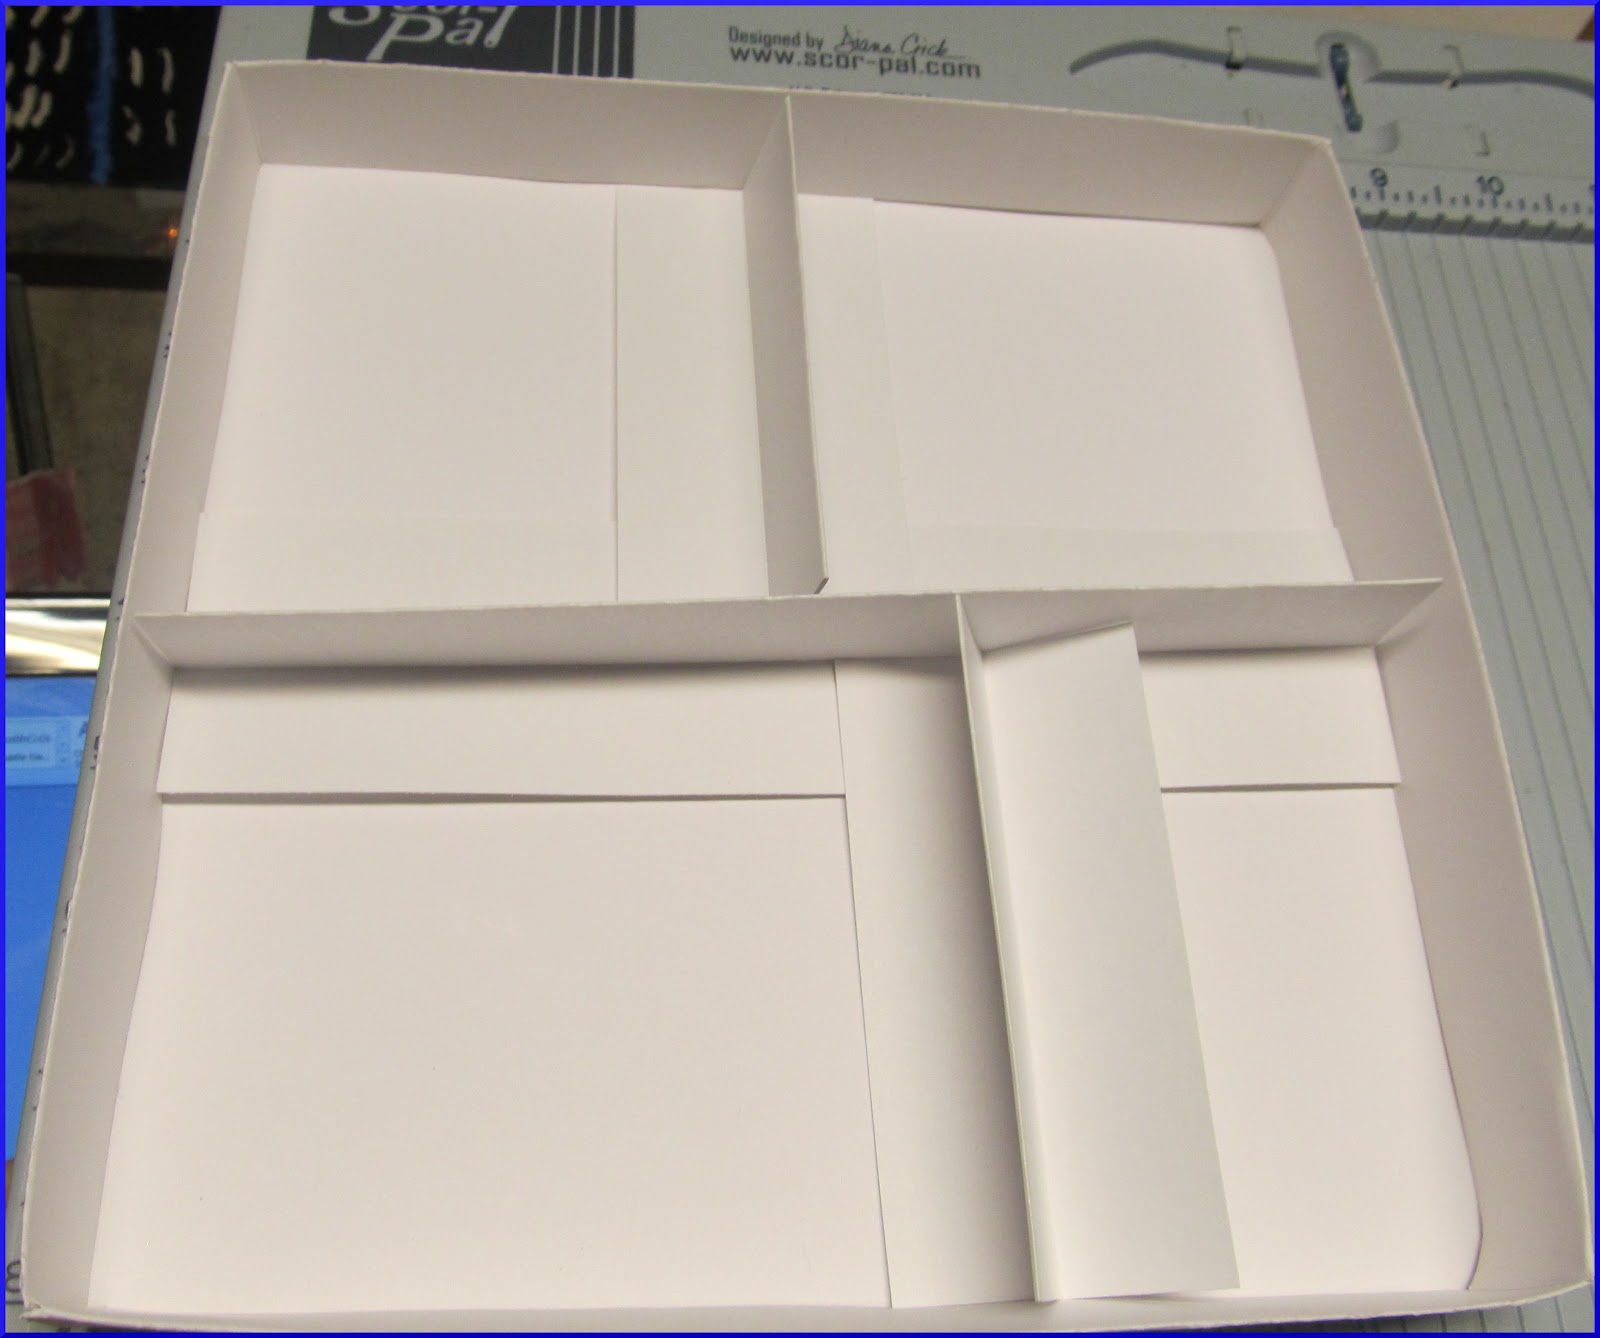
Step 13 once you have decided where you want your
dividers and they are taped in place - I then use my hot glue gun
and add a dot or two of glue to the Shadow Box side and
divider to hold them together, I also add a dab of hot glue to
the middle divider and the smaller dividers.


Now you are ready to create and decorate your own Shadow Box!
Hope you enjoyed it as much as I did making it!
Pin It
2 comments:
This is just gorgeous shadow box,love the image and fab colours, really need to make one, great tutorial....Big hugs Jo xxx
Oh wow this is gorgeous! great tutorial too:)x
Post a Comment
Thanks for visiting! I love to read your comments and appreciate each one of them!
Crafty Hug's xxx